
How to supply print-ready artwork
Most files that reach us are almost right. Here is the short checklist that turns "almost" into a print that comes back exactly as you designed it.
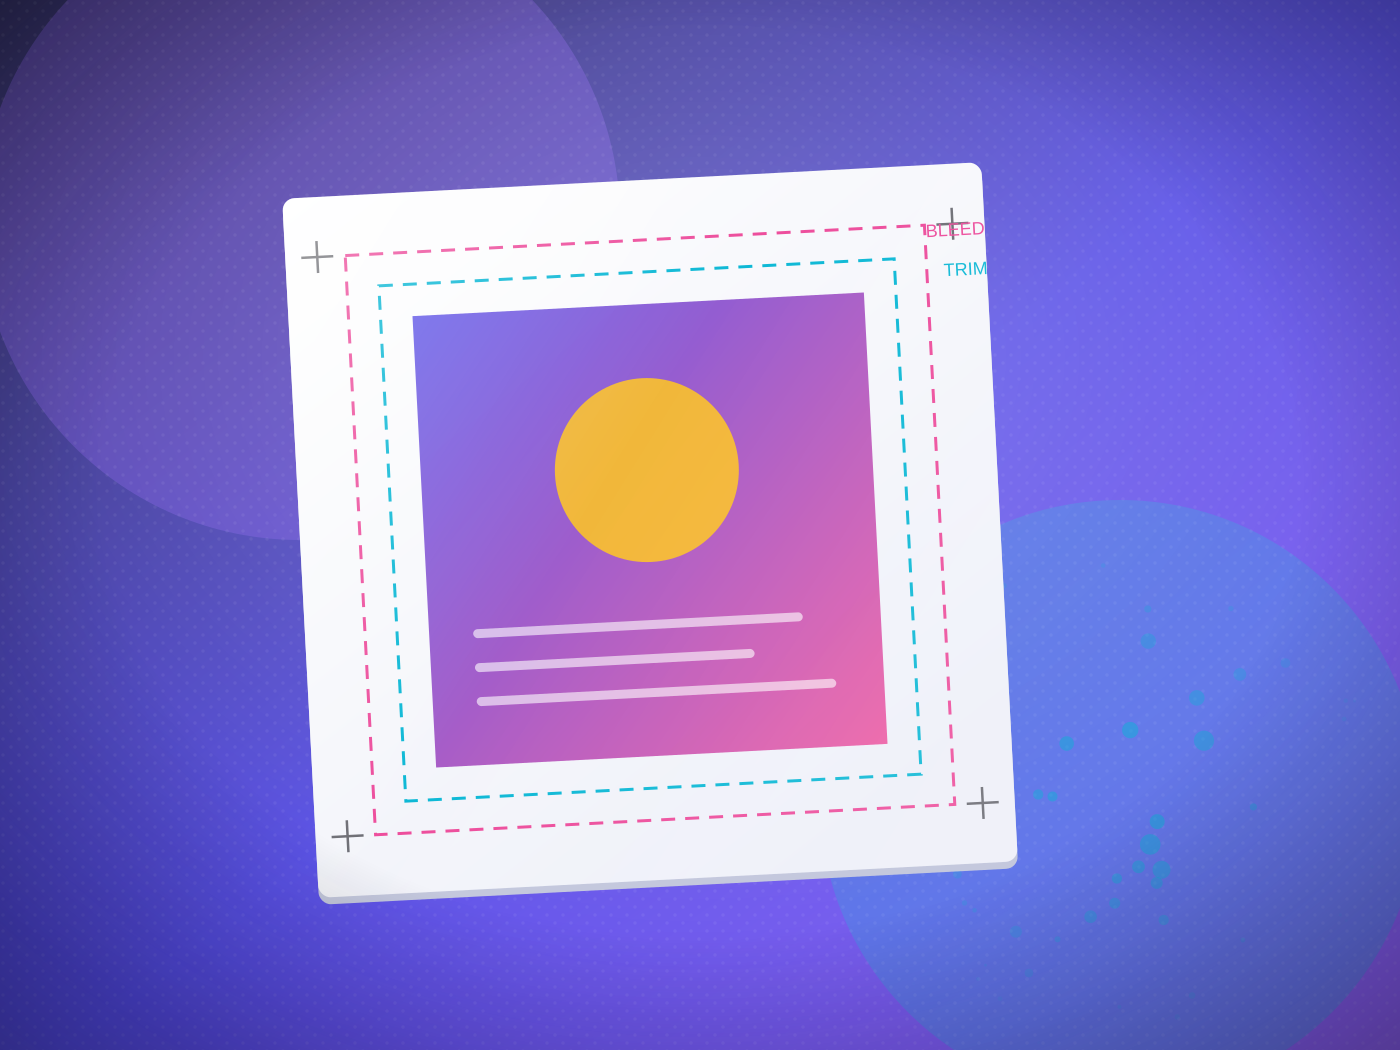
We check every file for free before it prints, and fix what we can. But a file that arrives print-ready prints faster, cheaper and with no back-and-forth. Here is what "print-ready" actually means.
1. Supply a PDF
A press-ready PDF is the safest format — fonts and images are locked in, so nothing reflows or drops out on our end. Export at high quality with crop marks and bleed included.
2. Add 3mm of bleed
Extend any colour or image that runs to the edge by 3mm past the trim. When the sheet is cut, that margin absorbs the tiny movement of the guillotine, so you never get a thin white line down one side.
3. Keep text clear of the edge
Pull anything you need to read — text, logos, borders — at least 3–5mm inside the trim. A border sitting right on the cut line is the single most common way a job comes back looking uneven.
4. Work in CMYK
Print is four inks: cyan, magenta, yellow and black. Files built in RGB have to be converted, and the brightest screen blues and greens dull down when they are. Design in CMYK and what you see is much closer to what prints.
5. Use images at 300dpi
An image that looks sharp on screen can be far too low-resolution for print. At the size it will print, aim for 300 dots per inch. A logo pulled off a website is almost never enough.
Not sure?
Send us what you have. We will tell you exactly what it needs — and if it is easier, our studio will set it up for you and show you a proof before anything runs.
Not sure what yours needs?
Bring it to any counter. Two minutes with a craftsperson beats any amount of reading — including us telling you it is not worth the money.